Composting at home is a simple way to reduce waste and create nutrient-rich soil for your garden. It involves collecting organic materials like food scraps and yard waste, then allowing them to break down naturally into compost that improves soil health.
You don’t need special equipment or extensive knowledge to get started. With some basic steps and regular maintenance, anyone can turn household waste into valuable compost.
This guide will cover the essentials of home composting, helping you understand what materials to use and how to manage the process effectively.
What is Composting?
Composting transforms organic waste into nutrient-rich material that supports plant growth. Different methods exist to suit various spaces and needs. Composting also offers practical benefits such as reducing waste and improving soil health.
Definition of Composting
Composting is the natural process of breaking down organic materials like food scraps, yard waste, and paper into humus, a dark, soil-like substance. Microorganisms, fungi, and small invertebrates accelerate this decomposition by consuming the organic matter.
This process requires the right balance of carbon-rich (“browns”) and nitrogen-rich (“greens”) materials, moisture, and oxygen. Once these conditions are met, composting converts waste into usable compost over weeks or months.
Types of Composting Methods
There are several methods to compost at home:
- Cold composting: A low-maintenance, slow process that requires less turning but takes longer to produce compost.
- Hot composting: Involves frequent turning and maintaining higher temperatures to speed up decomposition, usually producing compost in weeks.
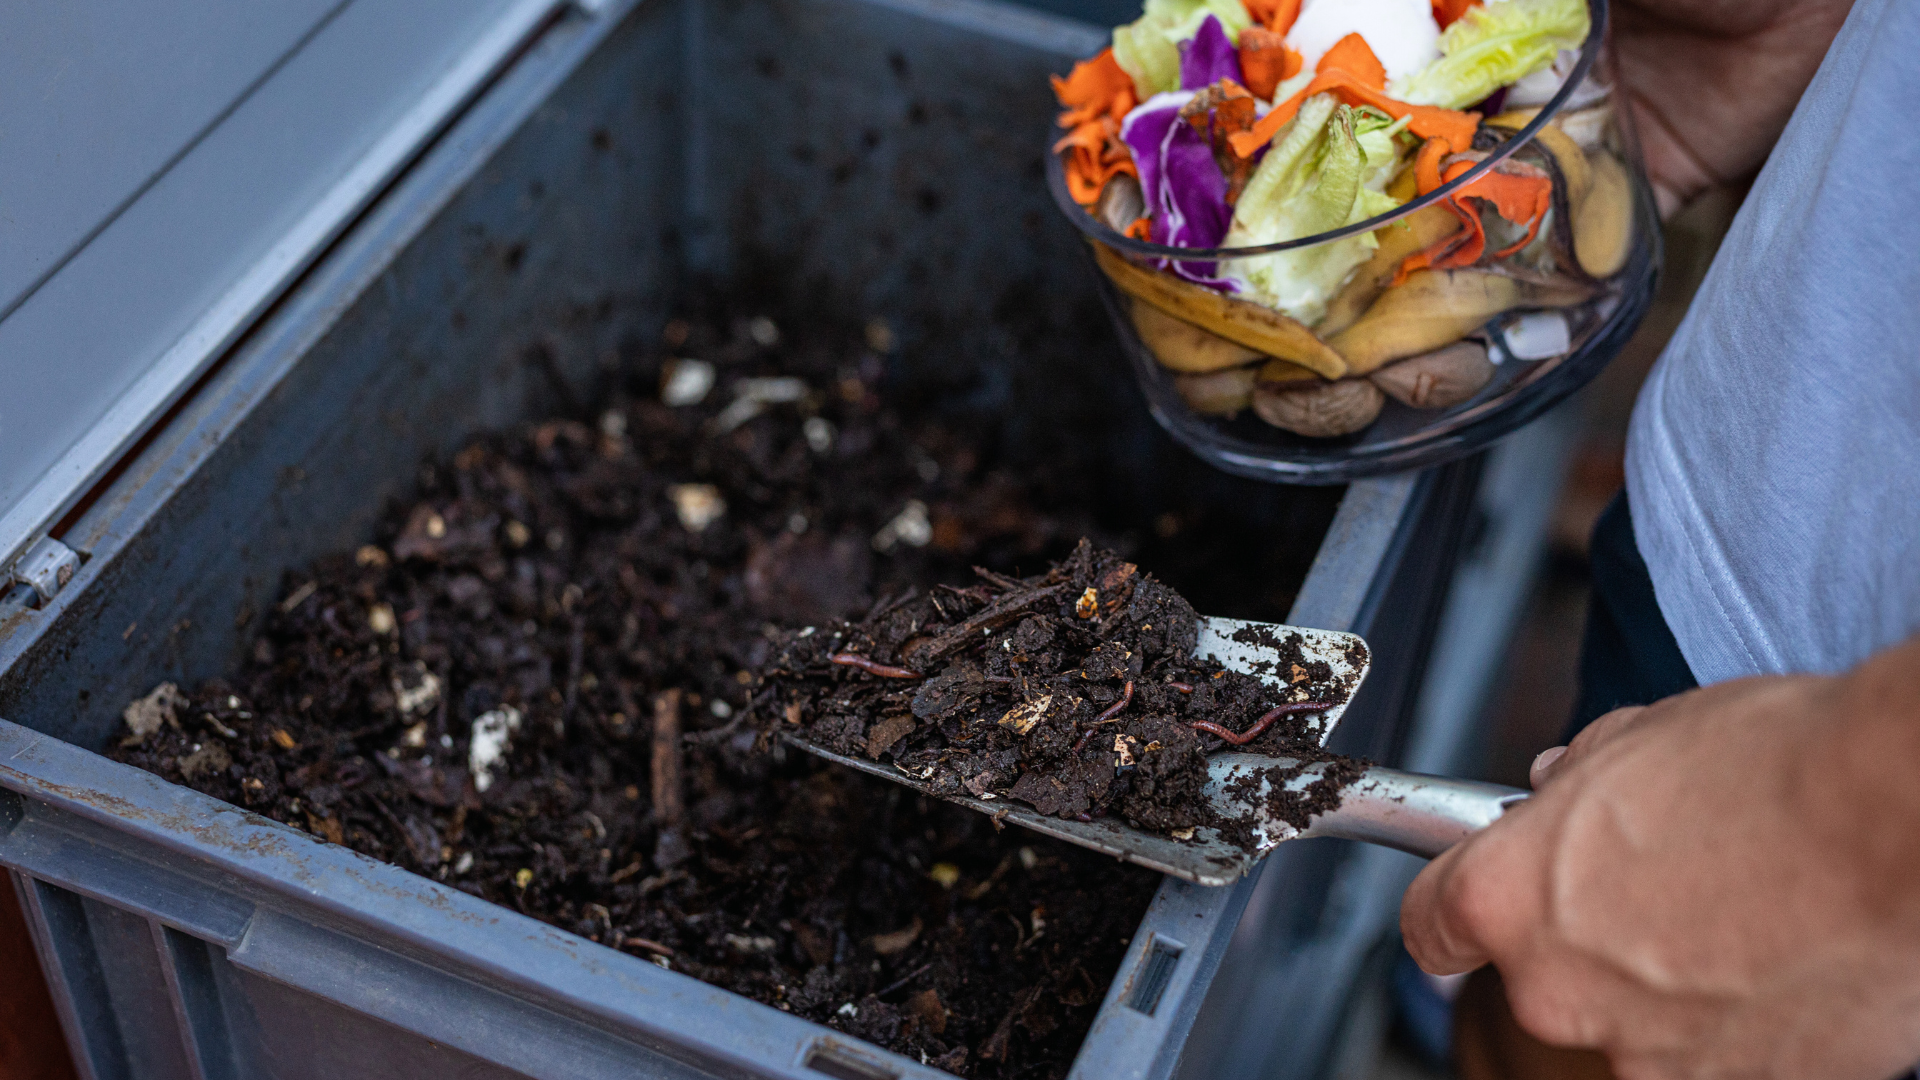
- Vermicomposting: Uses worms to break down food scraps quickly in a controlled container.
- Trench composting: Involves burying organic waste directly in garden soil to decompose slowly underground.
Each method varies in speed, effort, and space needed.
Benefits of Composting at Home
Composting reduces household waste volume, lowering the amount sent to landfills. It also cuts methane emissions, a potent greenhouse gas generated by decomposing organic matter in landfills.
Home compost enriches garden soil by adding nutrients and improving texture and water retention. It reduces or eliminates the need for chemical fertilizers, benefiting the environment and plants alike. Composting can also save money by recycling kitchen scraps and yard waste into valuable soil amendments.
Getting Started with Home Composting
Starting composting at home requires selecting the right type of container, finding an appropriate spot in your yard or home, and gathering a few essential tools and materials. Each decision affects how efficiently your compost breaks down and how easy the process will be.
Choosing the Right Compost Bin
Compost bins come in various sizes and materials, such as plastic, metal, or wood. For beginners, a plastic or metal bin with good ventilation holes is ideal because it retains heat well and prevents pests.
Bins should be large enough to hold at least 3 feet wide by 3 feet high to maintain proper airflow and heat, but manageable for turning the compost. Tumbling bins make turning easier but cost more, while stationary bins are cheaper but require manual mixing.
Seal-tight lids or pest-proof features are important to keep rodents and insects out. Consider your available space and budget when choosing a model.
Selecting a Composting Location
Pick a spot with partial shade to avoid your compost drying out or overheating. Near a water source is helpful for maintaining moisture. The ground should be level and free of standing water.
A place with good air circulation speeds up decomposition and reduces odors. Avoid placing the bin too close to your house to prevent unwanted pests near your home.
If space is limited, consider indoor composting options like worm bins or bokashi systems.
Basic Tools and Materials
You will need a garden fork or compost aerator to turn and mix the pile regularly to introduce oxygen. A watering can or hose helps keep the pile moist without soaking it.
Materials fall into two categories: “greens” (nitrogen-rich), such as vegetable scraps, coffee grounds, and fresh grass clippings; and “browns” (carbon-rich), like dry leaves, cardboard, and paper.
Balance is key: aim for roughly 2/3 browns to 1/3 greens. Avoid meat, dairy, oily foods, and pet waste, which can attract pests and slow decomposition.
What Can and Cannot Be Composted
Composting requires a balance of materials that provide nitrogen and carbon. Knowing which items contribute to a healthy compost pile and which ones should be excluded will help you avoid problems like odors, pests, or slow decomposition.
Green Materials
Green materials supply nitrogen essential for microbial activity. Common green materials include:
- Vegetable and fruit scraps
- Coffee grounds and filters
- Fresh grass clippings
- Tea bags (without synthetic materials)
- Plant trimmings
These materials tend to be moist and rich in nitrogen, speeding up the decomposition process. Avoid using large amounts of green materials alone, as this can cause the pile to become slimy or smelly. Mixing green with brown materials is key to proper composting.
Brown Materials
Brown materials provide carbon, which balances nitrogen and adds structure for airflow. Examples of brown materials:
- Dry leaves
- Straw or hay
- Cardboard and paper (shredded)
- Wood chips and sawdust (untreated)
- Pine needles
Brown materials are typically dry and fibrous. They slow decomposition but prevent odor and compaction. Shred or break large pieces to speed up the breakdown. Avoid glossy or heavily inked papers, as they may contain chemicals.
Items to Avoid in Compost
Certain items can harm the composting process or attract pests. Items to exclude include:
- Meat, dairy, and oils
- Diseased plants or weeds with seeds
- Pet waste and cat litter
- Synthetic materials like plastics and metals
- Chemically treated wood or paper
These materials may cause odors, introduce pathogens, or contaminate the compost. Avoid adding large amounts of onion or citrus peels, as they can slow microbial activity, but small quantities are generally safe.
Setting Up Your First Compost Pile
Start by arranging different materials properly to speed up decomposition. Maintaining the right mix and conditions for moisture and air is critical to avoid odors and pests.
Layering Organic Materials
Create your compost pile by alternating layers of organic waste. Begin with coarse materials like small branches or straw to promote airflow at the base.
Next, add a layer of nitrogen-rich materials such as kitchen scraps, grass clippings, or coffee grounds. This layering encourages microbial activity and balanced decomposition.
Repeat these layers, keeping them about 3–6 inches thick. Avoid compacting the pile tightly to preserve air pockets essential for aerobic breakdown.
Balancing Greens and Browns
Greens supply nitrogen, while browns provide carbon—both are needed for healthy compost. Aim for a ratio close to 2 parts browns to 1 part greens by volume.
Examples of browns: dry leaves, cardboard, paper, and wood chips. Examples of greens: fruit scraps, vegetable waste, fresh grass clippings, and tea bags.
Too many greens cause a smelly, soggy pile. Too many browns slow decomposition. Adjust by adding dry materials if it smells, or fresh scraps if it feels dry and slow.
Moisture and Aeration Tips
Keep the compost moist but not soaked, similar to a wrung-out sponge. Check moisture weekly and add water or dry browns accordingly.
Turn the pile every 1–2 weeks with a garden fork or pitchfork. Turning introduces oxygen and speeds up breakdown.
If the pile is compacted or smelly, increase aeration immediately. Avoid waterlogging, as it leads to anaerobic conditions and odor development.
Maintaining Your Compost
Proper care involves regularly mixing the materials, keeping an eye on temperature, and addressing common problems promptly. These steps ensure the compost breaks down efficiently and remains healthy.
How to Turn the Compost
Turning compost introduces oxygen, which helps microbes break down the organic matter. Use a pitchfork or compost aerator tool to mix the pile thoroughly every 1-2 weeks.
Start from the edges and move materials toward the center, flipping the bottom layers to the top. This redistributes moisture and heat evenly. Avoid turning too often, which can disrupt microbial activity, or too infrequently, which slows decomposition.
Monitoring Temperature
Temperature indicates how well decomposition is occurring. Use a compost thermometer to check the core daily during the active phase. Ideal temperatures range from 130°F to 160°F (55°C to 70°C).
If it cools below 100°F (38°C), microbial activity slows down. In that case, turning the pile and adding nitrogen-rich material like kitchen scraps can help raise the temperature. Avoid overheating above 170°F (77°C), as it can kill beneficial microbes.
Troubleshooting Common Issues
Slow composting often results from low moisture or poor aeration. The pile should feel like a damp sponge; add water or turn it if too dry.
Bad odors usually signal excess moisture or food waste that isn’t breaking down. Mix in dry brown materials like leaves or shredded paper and turn the pile.
Pests can be minimized by avoiding meat, dairy, or oily foods and keeping the compost covered. Use a secure bin with a lid to discourage rodents and insects.
Harvesting and Using Finished Compost
Understanding when compost is fully decomposed, how to properly collect it, and where to apply it helps maximize its benefits for your plants and soil health.
Knowing When Compost is Ready
Finished compost is dark brown, crumbly, and smells earthy, resembling rich soil. It should no longer have recognizable food scraps or yard waste.
If the pile is hot or steaming, the process is still active. When the temperature cools and stops fluctuating, the compost is ready to use.
Avoid using compost that is wet, slimy, or has a sour odor, as this indicates incomplete decomposition or anaerobic conditions.
How to Harvest Compost
Use a garden fork or shovel to turn the pile and remove the finished compost from the bottom or sides. Fresh material often remains on top.
Sift the compost through a coarse screen (around ½ inch mesh) to separate larger pieces that need more breaking down.
Store the screened compost in a dry, covered bin to keep it ready for use while allowing any remaining decomposition to finish naturally.
Applying Compost in the Garden
Spread 1 to 3 inches of compost around plants or mix it into the top 6 to 12 inches of soil before planting. It improves soil texture, fertility, and moisture retention.
Use compost as mulch around trees and shrubs to conserve water and suppress weeds. Avoid piling it directly against stems or trunks to prevent rot.
For container plants, mix compost with potting soil in a 1:3 ratio to boost nutrient content without overwhelming roots.
Composting for Urban and Small Spaces
Compact composting methods allow people with limited space to recycle organic waste efficiently. These options include managing small-scale systems indoors or in close quarters without creating unpleasant smells or attracting pests.
Vermicomposting Basics
Vermicomposting uses worms, usually red wigglers, to break down food scraps quickly. This method produces nutrient-rich castings ideal for indoor plants or small gardens.
A worm bin can be as small as a plastic container with ventilation holes. Keep bedding moist but not wet, and feed worms small amounts of non-citrus vegetable scraps regularly.
Avoid adding meat, dairy, or oily foods, as these can harm the worms and attract pests. Harvest the worm castings every few months to maintain a healthy environment for the worms.
Indoor Composting Options
Indoor composting systems are designed to fit kitchens or apartments. Popular options include Bokashi bins and electric composters.
Bokashi fermentation uses anaerobic microbes to pre-digest food waste in a sealed container. It accepts all kitchen scraps, including meat and dairy, producing a compostable liquid and pre-compost.
Electric composters speed up decomposition using heat and agitation. They reduce waste volume quickly but require electricity and tend to be more expensive.
Both options minimize space needs and odors, making them suitable for urban dwellers.
Odor Control Strategies
Proper ventilation and moisture control are critical to odor-free composting. Too much moisture causes anaerobic conditions, leading to foul smells.
Add brown materials like shredded paper or dry leaves to balance nitrogen-rich food scraps. Turning or mixing the compost regularly introduces oxygen and prevents odor buildup.
For indoor bins, use activated charcoal filters or place the container in a cool, well-ventilated area. Avoid adding meat or oily foods that cause strong odors and attract pests.
Seasonal Composting Tips
Adjusting composting practices to seasonal changes helps maintain an active, healthy pile year-round. Winter requires protection from cold and moisture control, while hot weather demands additional aeration and moisture management to prevent overheating.
Composting in Winter
In cold months, microbial activity slows, so insulate your compost with materials like straw or leaves to retain heat. Use a compost bin with a lid or a cover to reduce moisture from snow and rain, which can make the pile soggy.
Add more “brown” materials such as dry leaves or shredded paper to balance moisture and nitrogen levels. Chop kitchen scraps into smaller pieces to speed decomposition. Turning the pile less often conserves heat but still ensures some airflow.
Keep the compost moist but not wet. Check the pile regularly for frost or ice buildup, which can impede decomposition. If using a worm bin, move it indoors to maintain a temperature between 55-77°F (13-25°C).
Hot Weather Composting
High temperatures can lead to rapid decomposition, but also risk overheating, which kills beneficial microbes. Turn the pile frequently (every few days) to introduce oxygen and prevent heat spikes above 160°F (71°C).
Maintain moisture by watering the pile as needed. Use a water spray to keep it damp but avoid saturation, which causes odor and slows microbial activity. Add dry browns like straw to absorb excess moisture.
Place the compost in a shaded or semi-shaded area to reduce temperature swings. Monitor actively to avoid pest issues that arise with smell or excess heat. Hot weather speeds up composting but demands attentive management to keep the process stable.
Sustainable Composting Practices
Efficient composting requires mindful habits that maximize resource use and minimize environmental harm. Focusing on waste reduction and understanding composting’s environmental effects enhances its benefits.
Reducing Food Waste
Food waste comprises a large portion of household garbage. Composting reduces landfill volume by turning scraps like vegetable peels, coffee grounds, and eggshells into useful material. Planning meals and storing food properly helps limit waste before composting begins.
Avoid composting meat, dairy, or oily foods to prevent odors and pests. Using a kitchen compost bin for daily scraps encourages consistency. Excess food can also be donated or repurposed, further decreasing waste.
A simple practice: keep a food scrap container in the fridge or on the counter. This keeps compostable waste fresh and convenient to add to the outdoor pile or bin.
Composting and Environmental Impact
Composting diverts waste from landfills, reducing methane emissions—a potent greenhouse gas produced by anaerobic decomposition. Proper composting breaks down materials aerobically, resulting in less harmful gases.
Finished compost enriches soil, improving water retention and reducing the need for chemical fertilizers. This supports healthier plant growth and reduces runoff that can pollute waterways.
Composting also lowers carbon footprints by recycling organic material locally instead of transporting waste to distant facilities. Using compost in gardening cuts down on synthetic inputs, promoting a more sustainable cycle.